download SQL 2012
2. Download based on your window version 64 bit or 32 bit
3. Select ENU\x64\SQLEXPRADV_x64_ENU.exe because it include management studio

4. Click on New SQL Server stand alone installation or add feature to an existing installation.

5. Below you will find the first set of Setup Support Rules. The Next button is available only if all check results are successful, or if failed checks do not block installation. SQL Server may take you automatically to next page if no rules fail.

6. Read and accept the license agreement and click next. At this point you can choose the features that you want to install. You can also change the install folder if you do not want to install to the default location.
Click Next to continue

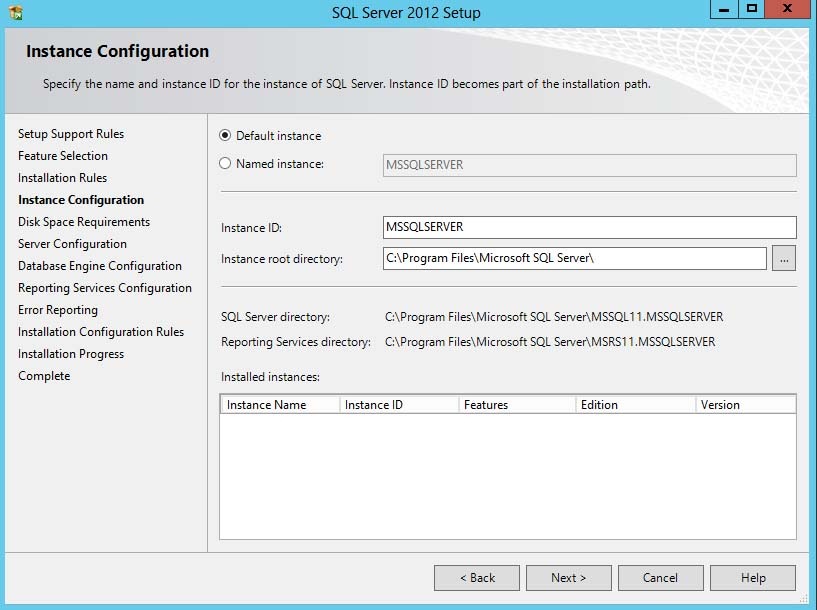
7. Now you can configure the SQL instance. If this is the first instance of SQL Server on your computer, you probably want to change this setting to Default instance. If you already have another instance of SQL Server, you will want to use Named Instance and give it a name
8. The next step is server configuration. From here you can change the Windows services associated with this instance of SQL Server. You can keep the defaults here unless you want to specify different user accounts for the services. You can also change the default collation settings if you are not in the United States.
Click Next to continue

9. Now we come to the Database Engine configuration. On the Server Configuration tab you can select whether SQL Server will only authenticate using Windows accounts or you can choose Mixed Mode which will allow Windows accounts and SQL accounts. I usually set this to mixed mode and set a password for the “sa” account. You can also add or remove accounts that will be SQL administrators.

10. On the Data Directories tab you can change the locations of various files that SQL will use. Depending on your server configuration and the load that will be put on SQL, you may want to put the database and log folders on separate drives. For most people, you can leave the default values.
Click Next to continue.

11. The next step configures Reporting Services. Set this to Install Only if you don’t need reporting services or may need them in the future. You can always go back and configure it later.
Click Next to continue

12. On the Error Reporting step, you can choose whether or not you would like to send error reports to Microsoft to help them improve future releases of SQL server.
Click Next to continue

13. At this point, SQL server will install on your computer. This could take a while to complete depending on the computer you are using.

14. Once the installation has completed, you will receive a screen showing the details of what was completed


No comments:
Post a Comment